Dashboard Designer: Existing Report Tiles (v2019.2+)
Existing ExpressViews, Advanced Reports, or CrossTab Reports can be added to a Dashboard. Existing filters and parameters can be accessed and modified from the Dashboard Designer. Reports on Dashboards have most of the same interactivity as in the Report Viewer, with the exception of the interactive sorts/filters dock.
More information about creating reports can be found in the sections on Reporting.
To add an existing report to a Dashboard, review the Dashboard Designer article. Tiles can be added from the  New Tile menu, or by dragging the report directly to the canvas from the
  Report Tree.
In v2021.1+:
If the report has prompting filters or parameters on it, these items can be modified in the corresponding Filters  and Parameters
  menus in the top toolbar. Review the Dashboard Designer: Filters and Dashboard Designer: Parameters articles for additional information.
Tile Properties Pane
Controls for building and interacting with the Existing Report tile are contained in the Tile Properties Pane on the right side of the screen. Click on the tile to select it and the Tile Properties Pane will fill with the properties for the selected tile.
Content
The Content tab for existing reports allows the report in the tile to be changed. Select the report from the list, and then click Apply. Only reports of the same type as the existing tile can be selected. For example, a tile which shows an ExpressView can only be changed to another ExpressView.
If an ExpressView is selected, the Suppress Tabular Detail Rows (pre-v2021.1) checkbox will be displayed at the bottom of the pane. Check this checkbox to hide all of the data detail rows when the ExpressView is in tabular view mode.
Note
Adding an existing report tile or changing the name of the report contained in the tile will require a Refresh of the tile’s contents if the Refresh Reminder feature is enabled in v2021.1.
Style
ExpressView
The Style tab for ExpressViews contains the Tile and Fit sections. This is how this tile appears on the canvas is changed. The settings here override the Canvas Format defaults.
- v2021.1.6+ Setting a Minimum Column Width prevents columns of the ExpressView from shrinking below a set number of pixels wide. A column that starts off less than this value (in the report design itself, for example) won’t expand to this value. Instead, originally narrow columns will use their own starting width as the minimum column width. If all of the columns are wider than the space available in the tile, a horizontal scrollbar appears. The default value is 100.
- Check Background to set a background color for the tile. Click Color to open the color selector and choose a background color. Unchecking the Background checkbox makes the tile transparent.
- Check Tile Header to set a background color for the tile’s header. Click Color to open the color selector and choose a background color. Unchecking the Tile Header checkbox makes the header background transparent.
Note
The Tile Header options are only shown if the Tile Header is visible on the canvas.
- Check Shadow to show a slight shadow effect around the tile.
- Check Border to apply a border to the tile.
- Check Customize Border to set the properties of each of the four tile borders individually. Leave unchecked to have the border properties applied equally to the four sides.
- Click Color to open the color selector and choose a border color.
- Width sets the border width in pixels.
- Round sets the roundness of the corners.
Other Report Types
The Style tab is broken down into two areas for other kinds of reports: Fit and Tile.
The Fit section determines how contents of the report are presented in the tile.
Note
Changing this setting will require a Refresh of the tile’s contents.
- Responsive Report Height will change the height of rows based on the size of the tile so that when the tile is expanded, the rows will fill the available space.
- Keep Original Report Cell Heights will not change the row height when the tile size is changed.
- v2021.1.6+ Setting a Minimum Column Width prevents columns of the report from shrinking below a set number of pixels wide. A column that starts off less than this value (in the report design itself, for example) won’t expand to this value. Instead, originally narrow columns will use their own starting width as the minimum column width. If all of the columns are wider than the space available in the tile, a horizontal scrollbar appears. The default value is 100.
The Tile section is where tile appearance can be changed. The settings here override the Canvas Format defaults.
- Check Tile Header to set a background color for the tile’s header. Click Color to open the color selector and choose a background color. Unchecking the Tile Header checkbox makes the header background transparent.
Note
The Tile Header options are only shown if the Tile Header is visible on the canvas.
- Check Shadow to show a slight shadow effect around the tile.
- Check Border to apply a border to the tile.
- Check Customize Border to set the properties of each of the four tile borders individually. Leave unchecked to have the border properties applied equally.
- Click Color to open the color selector and choose a border color.
- Width sets the width in pixels of the border.
- Round sets the roundness of the border corners.
Advanced
The Advanced Tab for Existing Reports is further broken down into two areas: Refresh and Navigation.
Refresh contains:
-
Designer pre-v2021.1
-
Refresh report when changes are made: check the checkbox to reload the data on the report whenever changes are made to the tile in the Designer. The report will always refresh when the Dashboard Designer is opened and when the tile is manually refreshed with the Tile Menu or the Refresh
 icon on the toolbar. Not available if the tile contains an ExpressView.
-
Refresh report when changes are made: check the checkbox to reload the data on the report whenever changes are made to the tile in the Designer. The report will always refresh when the Dashboard Designer is opened and when the tile is manually refreshed with the Tile Menu or the Refresh
- Viewer — check the box to enable automatic refreshing of the data in the Dashboard Viewer. Check the box and then set the number of seconds in between report refreshes. Uncheck the box to disable automatic report refreshing.
 icon on the toolbar. Not available if the tile contains an ExpressView.
Navigation contains additional options for controls which will be displayed in the tile when the report is run.
- Allow searching: check the checkbox to add a search box at the bottom of the tile that can search the report for data.
- Allow scrolling: will only be shown if the tile contains an Advanced Report. Check the checkbox to add scrollbars to the tile if the report contents extend beyond the bounds of the tile.
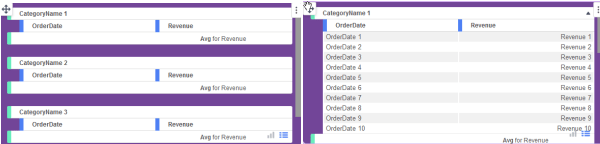
- Table/chart toggle button: will only be shown if the tile contains an ExpressView. Check the checkbox to include toggle buttons that allow switching between the visualization display mode and the tabular display mode. When unchecked, the toggle buttons are hidden.
