ExpressView: Exporting (v2021.1+)
Note
This section applies to ExpressView in v2021.1+ of the application. For previous versions, refer to ExpressView (pre-v2021.1)
ExpressViews are an easy way to display and visualize data. Exporting an ExpressView allows the contents of the report to be saved externally as either a PDF, Excel, RTF or CSV file. The system administrator may restrict the available file types, so all may not be available in all environments.
ExpressView may also be exported into an Advanced Report, where it may be further edited with the Advanced Report Designer.
For all export types except CSV, data as it is arranged in the ExpressView Designer and a visualization (if applicable) will be in the output file. Since CSV is a text-only format, visualizations cannot be exported in that format.
Formatting options set in the Canvas menu and the styling options (e.g. bold, italic, underline, horizontal alignment) will apply to PDF, RTF and Excel exports (only if Keep Cell Styling in Excel is checked in the Export Options menu)
Exporting to a File
There are several ways to export an ExpressView:
- From the Report Tree
- Default Action
- Report Options (right-click) Menu
- From the ExpressView Designer’s Export menu
- From the Scheduler Service
Report Tree
There are two ways to export an ExpressView directly from the Report Tree without first opening the ExpressView in the Designer.
If the ExpressView’s Report Tree Shortcut setting is set to Export Report:
- Click the default export type in the Report Tree.

Click PDF to export this ExpressView as a PDF directly from the Report Tree
Or, open the Report Options menu by either clicking the Menu  icon or right-clicking on the ExpressView item in the list. Choose from one of the available actions:
- Export As
- Schedule Report
- Email Report
For more information, review the Right-Clicking on Reports section of the Navigating the Application article.
Designer Export Menu
- Click the Export
 icon in the ExpressView Designer toolbar.
 - Choose an available export type.
Scheduler Service
When an ExpressView is executed on a schedule by the Scheduler Service, the resulting output will be an exported file. See the Scheduling an ExpressView section below for more information.
Scheduling an ExpressView
Note
The Scheduler Service is an optional feature. Contact your system administrator for assistance.
An ExpressView can be scheduled to execute on a schedule. When executed by the Scheduler Service, the ExpressView will be exported as one its available export file types.
Review the Scheduling Reports article to learn how to schedule a report.
Examples
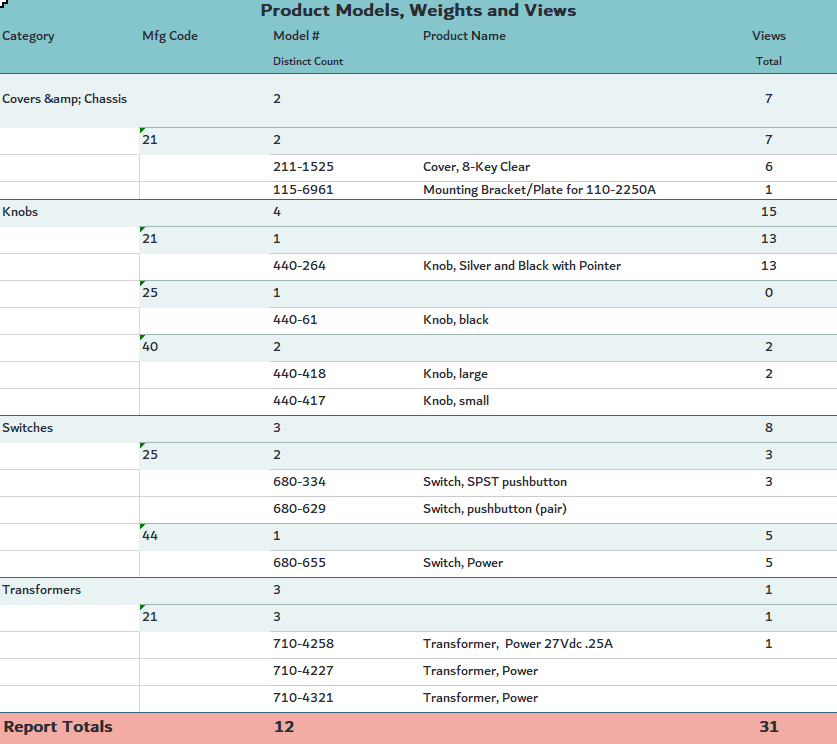
Consider the below ExpressView with two groups, several detail fields and a simple visualization.
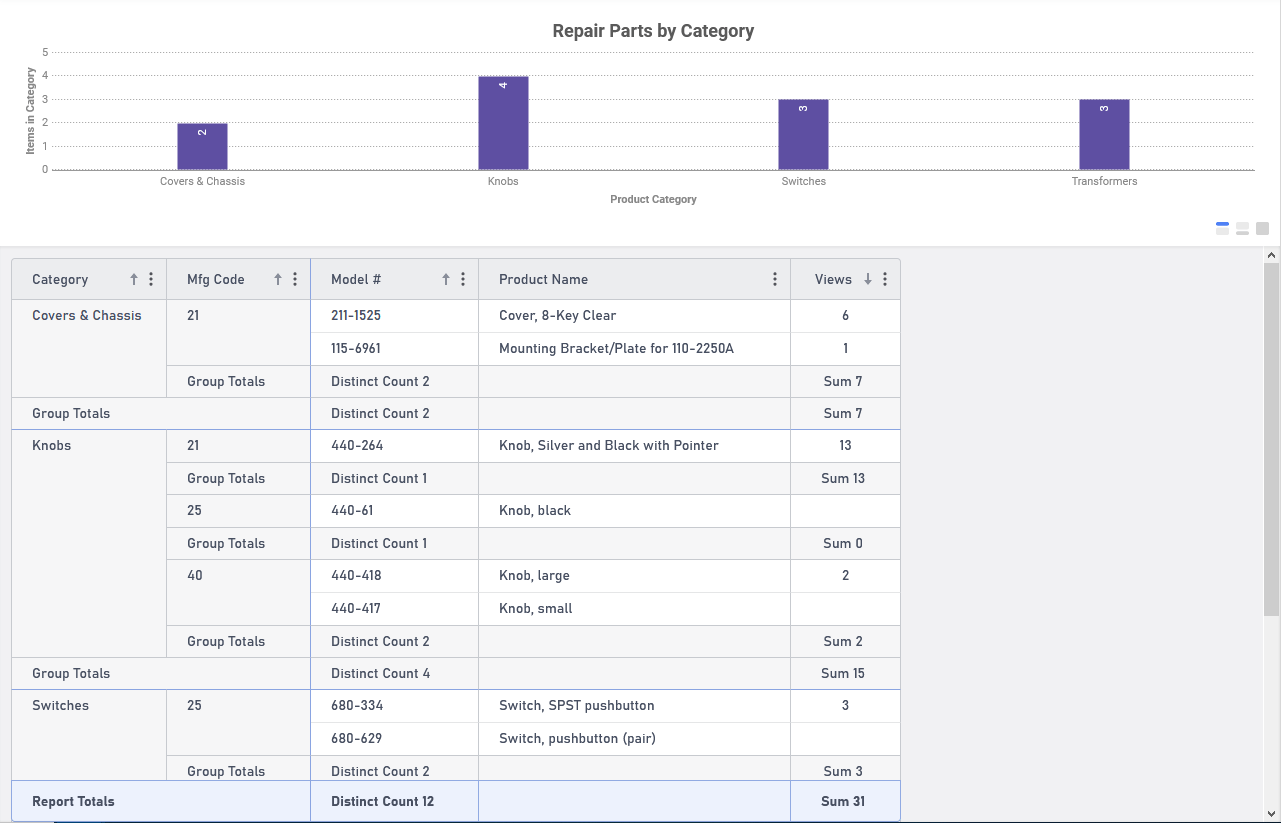
Files can be exported in a format that either resembles the report layout, or in a format that may be easily imported into another system. Reports exported as PDF and RTF always resemble the report layout. Excel and CSV exports have options to change the data export mode. These options are discussed further in the Other Options section of this article.
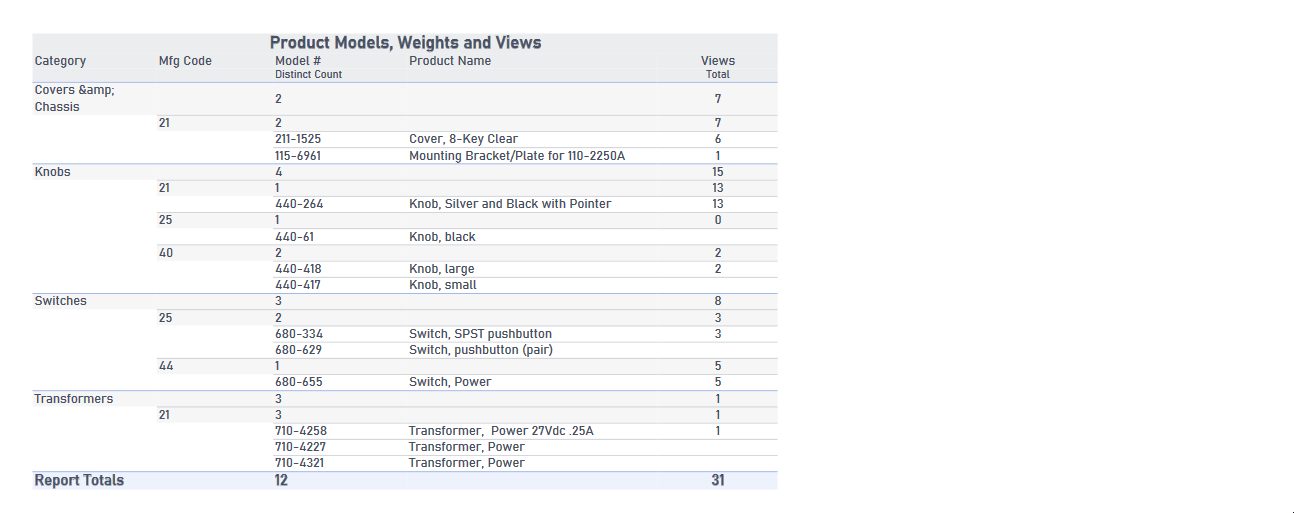
Report Layout
Report exported as a PDF file
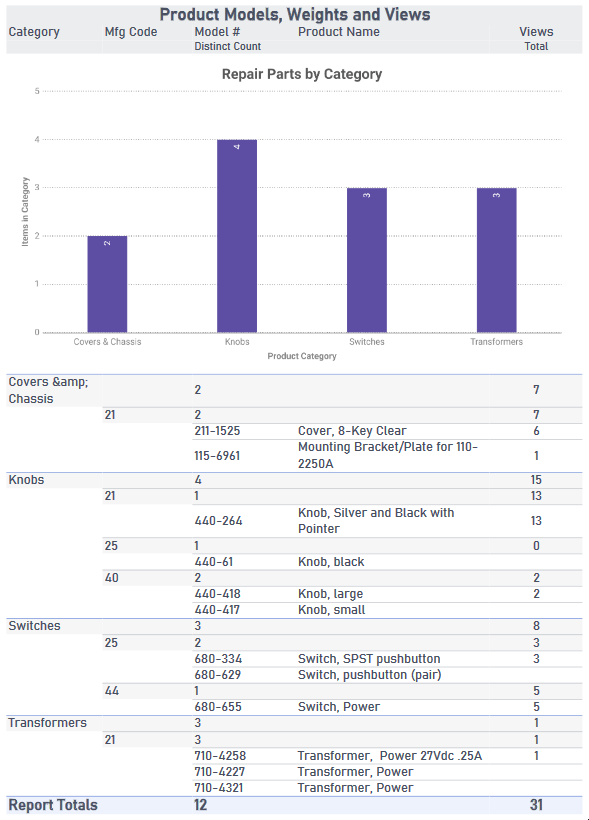
Report exported as an RTF file
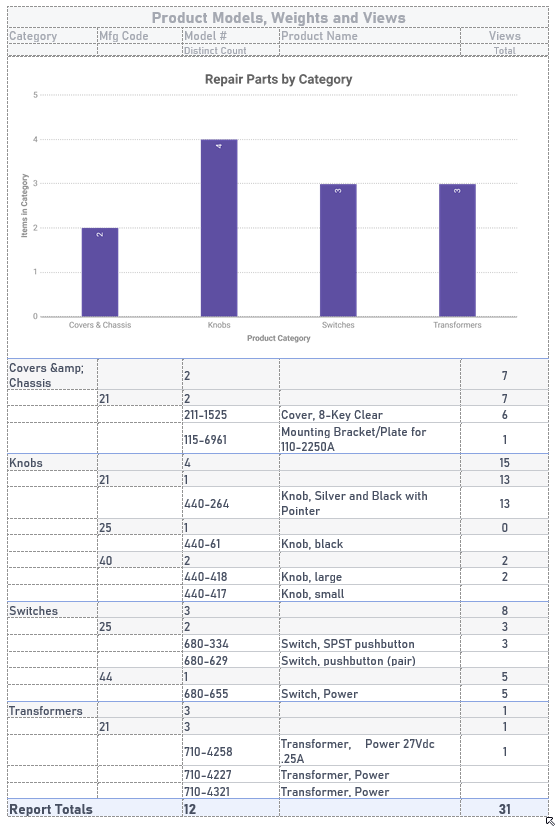
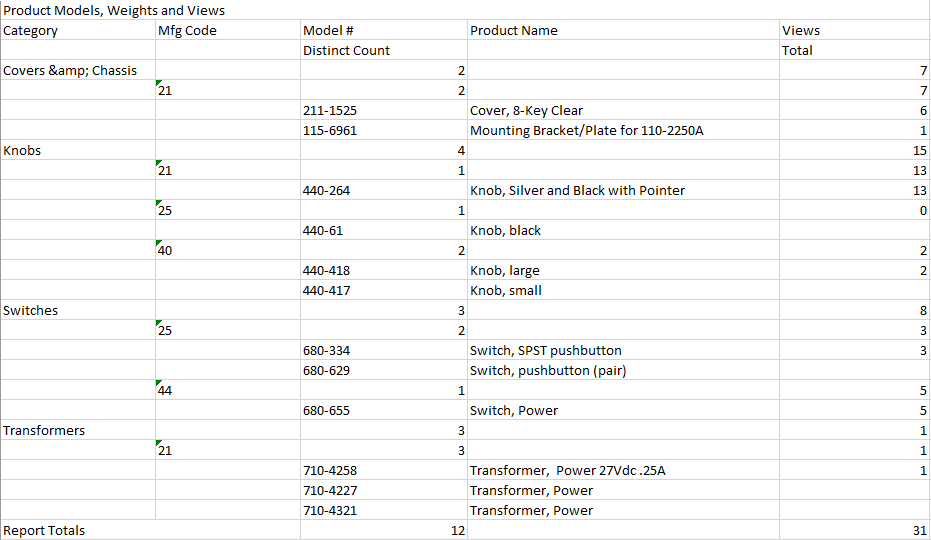
Report exported as an Excel file with Keep Cell Styling in Excel enabled and Flatten Groups in Excel and CSV disabled
CSV files support text only, so visualizations cannot be rendered in them.
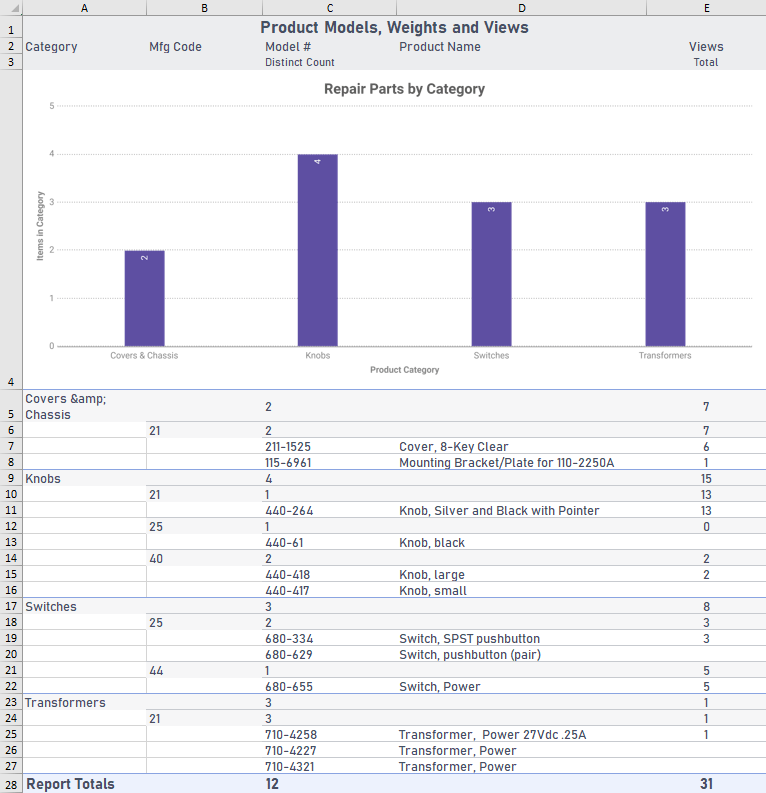
"Product Models, Weights and Views","","","",""
"Category","Mfg Code","Model #","Product Name","Views"
"","","Distinct Count","","Total"
"","","","",""
"Covers & Chassis","","2"," ","7"
"","21","2"," ","7"
"","","211-1525","Cover, 8-Key Clear","6"
"","","115-6961","Mounting Bracket/Plate for 110-2250A","1"
"Knobs","","4"," ","15"
"","21","1"," ","13"
"","","440-264","Knob, Silver and Black with Pointer","13"
"","25","1"," ","0"
"","","440-61","Knob, black",""
"","40","2"," ","2"
"","","440-418","Knob, large","2"
"","","440-417","Knob, small",""
"Switches","","3"," ","8"
"","25","2"," ","3"
"","","680-334","Switch, SPST pushbutton","3"
"","","680-629","Switch, pushbutton (pair)",""
"","44","1"," ","5"
"","","680-655","Switch, Power","5"
"Transformers","","3"," ","1"
"","21","3"," ","1"
"","","710-4258","Transformer,  Power 27Vdc .25A","1"
"","","710-4227","Transformer, Power",""
"","","710-4321","Transformer, Power",""
"Report Totals","","12"," ","31"
For Easy Import
When groups are flattened in Excel and CSV exports, groups become columns that repeat for each row of data. This is helpful when importing the data into another system that requires, for example, the name of the product category to accompany the rest of the product’s information on each line of the file. Groups are flattened by a setting in the Export Options section, more information is below.
Caution
When groups are flattened, group and report totals will be removed from the report output.
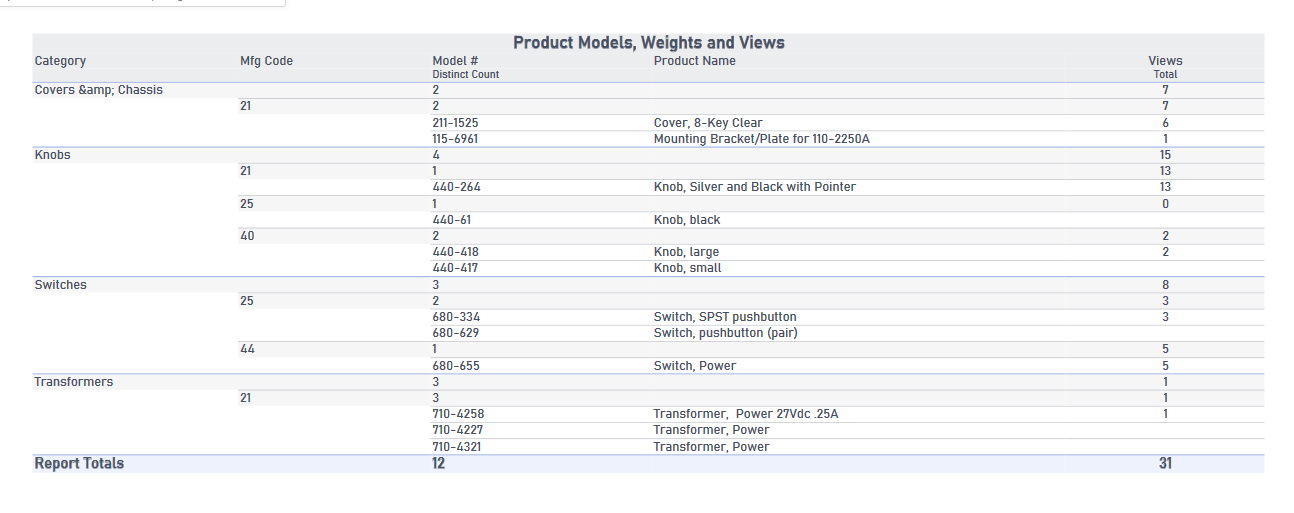
Report exported as an Excel file with Flatten Groups in Excel and CSV enabled
CSV files support text only, so visualizations cannot be rendered in them.
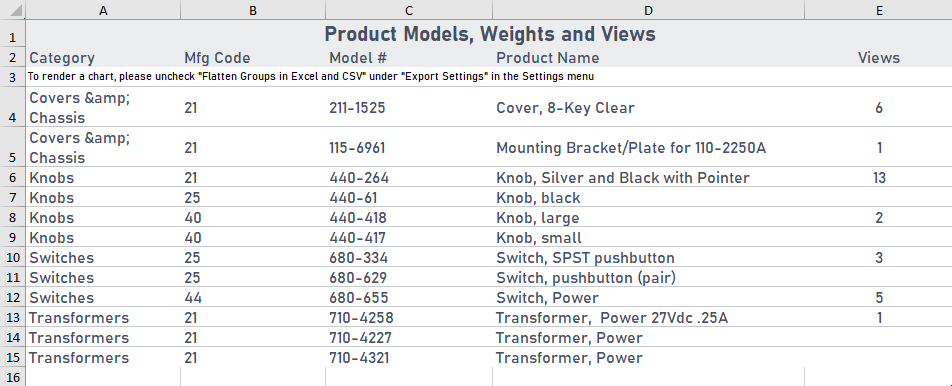
"Product Models, Weights and Views","","","",""
"Category","Mfg Code","Model #","Product Name","Views"
"To render a chart, please uncheck ""Flatten Groups in Excel and CSV"" under ""Export Settings"" in the Settings menu","","","",""
"Covers & Chassis","21","211-1525","Cover, 8-Key Clear","6"
"Covers & Chassis","21","115-6961","Mounting Bracket/Plate for 110-2250A","1"
"Knobs","21","440-264","Knob, Silver and Black with Pointer","13"
"Knobs","25","440-61","Knob, black",""
"Knobs","40","440-418","Knob, large","2"
"Knobs","40","440-417","Knob, small",""
"Switches","25","680-334","Switch, SPST pushbutton","3"
"Switches","25","680-629","Switch, pushbutton (pair)",""
"Switches","44","680-655","Switch, Power","5"
"Transformers","21","710-4258","Transformer,  Power 27Vdc .25A","1"
"Transformers","21","710-4227","Transformer, Power",""
"Transformers","21","710-4321","Transformer, Power",""
Export Options
When building an ExpressView that will be exported, the Export Options should be considered to set certain characteristics of the exported output.
To change the export settings, from the  Export menu on the toolbar, hover over Export Options.
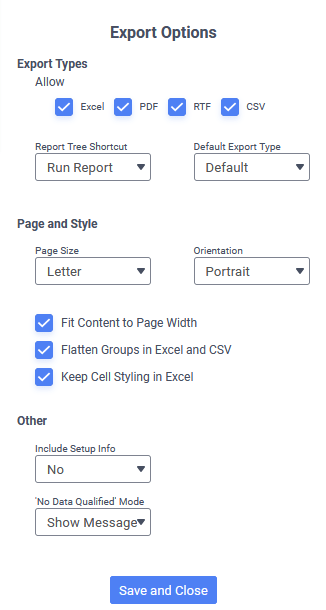
ExpressView Export Options dialog
The export settings are arranged in three groups: export types, page and style and other.
Export Types
The Export Types section determines how exporting is accessed through the application.
- Types Allowed — uncheck any file types that the report should not be exported to. The default is for all file types to be checked.
Note
The system administrator can restrict the availability of certain export file types, so all four types may not be available.
- Report Tree Shortcut — choose the action that is available when selecting the report in the Report Tree. Choose Default to use the behavior set by the system administrator, Run Report to execute the report in the ExpressView Designer or Export Report to export the report in the Default Export Type. The default setting is Default.
Report Tree item for an ExpressView with Report Tree Shortcut set to Run Report (top) and Export Report (bottom) - Default Export Type — choose the export file type that will be used by default when exporting directly from the Report Tree or when scheduling the report’s execution with the Schedule Wizard. Choose Default to use the file format set by the system administrator, or explicitly choose a file format. The default setting is Default.

Page and Style
The Page and Style section determines the size of the pages in Excel, PDF and RTF exports.
- Page Size — choose the page/paper size. Choices are common named US and ISO paper sizes (e.g. Letter, Legal, Tabloid, A4, etc…) The default value is Letter.
- Orientation — choose either Portrait or Landscape page orientation. The default is Portrait.
- Fit Content to Page Width — check this box to stretch the contents to the available width of the page. The default value is checked.
An ExpressView on a wide paper size with Fit Content to Page Width unchecked (top) and checked (bottom) Note
This setting only controls whether or not the content will expand to fit a page that is wider than the data. Exported data will always compress to fit in the available page width if the page is smaller than the data.
- Flatten Groups in Excel and CSV — choose how to handle the inclusion of group headers in the exported data for Excel and CSV file outputs. When checked, the groups are “flattened”. Groups become columns that repeat for each row of data. When unchecked, the groups remain in their hierarchical positions, and only appear when they change. The default value is checked.
Caution
When groups are flattened, group and report totals will be removed from the report output.
An ExpressView exported to Excel with Flatten Groups in Excel and CSV unchecked (top) and checked (bottom) Caution
Enabling Flatten Groups in Excel and CSV on an ExpressView that doesn’t have Detail Rows visible (unchecked on the toolbar) will result in an empty output file.
- Keep Cell Styling in Excel — choose to either retain or remove styling such as font, and background color when exporting to Excel. The default value is checked.
An ExpressView exported to Excel with Keep Cell Styling in Excel checked (top) and unchecked (bottom)
Other
The Other Options determine additional content and behavior in the output.
- Include Setup Info — choose to include information about sorts, filters and data objects that are included in the report. Choose from:
- No — additional setup information is not included in the output file
- Top — additional setup information is included at the beginning of the output, before the report content
- Bottom — additional setup information is included at the end of the output, after the report content
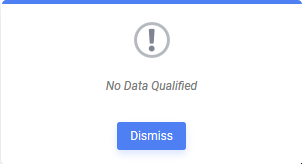
- ‘No Data Qualified’ Mode — choose what action should be taken if there is no data that qualifies to be included in the output (e.g. a filter excludes all possible rows). The default value is Show Message. Choose from:
- Show Message — display a message in a dialog box that no data is qualified for the report. Stop execution and do not return any file.
- Show Report — continue with report execution and return a file with the report headers and footers but without any data.
- Show Message — display a message in a dialog box that no data is qualified for the report. Stop execution and do not return any file.

Exporting to an Advanced Report
To export an ExpressView to an Advanced Report:

- Click the Export menu on the toolbar. Hover over Advanced Report.
- Provide a report name in the Name field for the Advanced Report.
Note
Even though the new report will be of a different type, it must have a unique report name.
- Select a Folder to save it to in the report tree browser.
- Click Create Advanced Report.
The Advanced Report Designer will open with the newly created report for immediate editing.
