Storage Management: Getting Started
Recommended Reading
- Storage Management: Introduction
- Storage Management: Database Schema
- Storage Management: Admin Console
Microsoft SQL Server, MySQL, Oracle and PostgreSQL databases are supported out-of-the-box. Exago also supports a SQLite database for development, testing and demonstration. To use a different database type, consider writing a custom implementation of the Storage Management library.
Important
Exago recommends using the included SQLite database for development, testing and demonstration purposes only. Use MSSQL, MySQL, Oracle or PostgreSQL in a production environment.
Installing Exago for the First Time
In order to install Exago for the first time, it is necessary to configure the report storage system. Prior to v2020.1 there was a requirement to set the Report Path. Now with Storage Management, the following steps are required to get the report storage mechanism up and running:
- Point your browser to the Administration Console. By default this is http://<YourServer>/Exago/Admin.aspx. Double-click
 Storage Management.
 - Configure and create the database.
- Decide which database type to use: either Microsoft SQL Server, MySQL, Oracle, PostgreSQL or SQLite. SQLite is recommended for testing and evaluation purposes but not for production. SQLite databases can be upgraded to one of the other types later on.
- Make the selection in the Database Type dropdown.
- Provide the Database Provider and Database Connection string. Review the Database Section of the Storage Management Admin Console article for assistance with these settings.
- Optional: provide a prefix or schema for the database tables. Review the Storage Management: Database Schema article, or hover your mouse over Tables and click the ‘click here’ link for assistance with these settings.
Hover over Tables to get additional help with these settings - Initialize the database. This can be done automatically by Exago, or manually by a database administrator. In v2021.2.0, the SQLite database comes pre-initialzed, so this step may be skipped if using that database.
- Automatically (recommended): click the Prepare Database button. When prompted, click Okay to confirm you want to initialize the database. Exago will create the tables, schema and load default values into the database specified in steps 2–4 above.
- Manually (optional): click the Prepare Database (SQL) button. Exago will display SQL statements that can be copied and pasted into a database management system by a database administrator. Execute the statements before returning to Exago.
- Load the default themes into the database by clicking the Load Themes button.
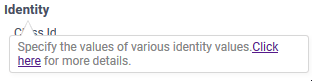
- Set the values for the Identity Keys.
Hover over Identity to get additional help with these settings - While in a testing or development environment where Exago may be accessed directly, the values specified here will be used whenever content in Exago is created. This is typically sufficient for testing and demonstration purposes if you are not experimenting with the Storage Management permissions system. All users will have the same access to all of the content in this scenario. Controlling access to content can be managed with Roles instead of the Storage Management permissions system.
- When generating Exago sessions through one of the APIs, the values specified here will be used if the identity keys are not set with the API at the time of session creation. It is strongly recommended that the identity keys be set appropriately as each session is created with one of the APIs. The User Identification article includes instructions and code samples how to do this with both the REST Web Service API and .NET API.
Review the Identity Keys section of the Storage Management: Introduction article or hover your mouse over Identity and click the ‘click here’ link for assistance with these settings for more information about these values.
- Set the Default Settings to determine how Exago will handle setting permissions information on newly created root content. Review the Default Settings section of the Storage Management Admin Console article for more information about each of these settings.
- To utilize new Storage Management inheritance, set the default settings as follows. Learn more about inheritance in the Storage Management: Introduction article. You will use the permission system built in to Storage Management to manage access to content. This will require making changes to the Storage Management database, either directly with SQL or with the Storage Management Utility.
- Inherit Flag: True
- Access Flags: Full Access (65535)
- To emulate legacy file system storage, refer to File System below.
- To emulate legacy Folder Management storage, refer to Exago’s Folder Management Example below.
- To utilize new Storage Management inheritance, set the default settings as follows. Learn more about inheritance in the Storage Management: Introduction article. You will use the permission system built in to Storage Management to manage access to content. This will require making changes to the Storage Management database, either directly with SQL or with the Storage Management Utility.
- Set the Cache Settings as desired. The default values are fine in most circumstances. Review the Cache Settings section of the Storage Management Admin Console article for more information.
 Storage Management.
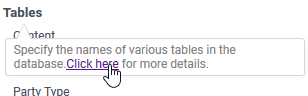
Upgrading from a SQLite Database to a Production Database
Use the ImportExportStorageMgmt command line utility, available in v2020.1.17+ and v2021.1.5+, to transition one SM database to another.
Review the Transitioning Between Storage Management Databases article for full details.
Upgrading from a pre-v2020.1 Version of Exago
When upgrading from pre-v2020.1, consult the Storage Management: Transitioning from Legacy Storage Methods article. This guide describes a general storage upgrade procedure and then lays out the steps for updating file system, cloud and Folder Management. Be sure to include the Themes directory when making the transition. Otherwise, no chart, map or report themes will be available after the upgrade.
Emulating a Legacy Storage Mechanism
In certain circumstances, it may be desirable to emulate the behavior of the legacy storage mechanism rather then changeover to the new permissions model provided by Storage Management. In these cases, setting the Admin Console > Storage Management > Default Settings as described below will result in similar behavior.
File System and Cloud Storage
In a file system, no content access permission model was available. Set the default settings as follows. You will use Roles to manage who has access to content in the system.
- Inherit Flag: False
- Party Type: Everyone
- Access Flags: Full Access (65535)
The Exago provided transitioning tools FileSystemToJson or LoadReportsToDb -D will use system as the Owner ID for all content loaded from a legacy file system. Therefore, we recommend setting the Owner Id to system in the Admin Console when emulating a file system storage system.
Exago’s Folder Management Example
Using Exago’s Folder Management sample code provided a content permission system that did not include inheritance. Therefore, set the default settings as follows. You will use the permission system built in to Storage Management to manage access to content. This will require making changes to the Storage Management database, either directly with SQL or with the Storage Management Utility.
- Inherit Flag: False
- Party Type: UserId
- Access Flags: Full Access (65535)
