Roles
This article applies to the Admin Console >  Roles settings.
This article explains how to use the Roles to control access to data and override the General Settings.
Create, Edit, Delete Roles
- To add a new role click
 Roles in the Main Menu and either:
- click the Add icon at the top of the main menu
- right-click and select Add from the context menu
- click the Add
- To edit a role either:
- double click it
- select it, expand the sections (Main, General, Folders, Objects or Filters) and click the Edit icon at the top of the main menu
- To delete a role either:
- select it and click the Delete icon at the top of the main menu
- right-click it and select Delete from the context menu
- select it and click the Delete
- To save changes and new joins click the Apply or Okay buttons.
 icon at the top of the main menu
 Add from the context menu
 icon at the top of the main menu
 icon at the top of the main menu
 Delete from the context menu
The Role that is currently active will be highlighted under the Roles menu of the Admin Console.

About Roles
Roles are created to specify how a user or group of users interfaces with Exago. Roles can restrict access to folders or data objects. Roles can also override the General Settings.
Note
Exago was designed to be an integrated reporting solution for other applications using the application’s own security and authentication methods. Although you can create Roles through the Admin Console, Roles are typically created through the API to dynamically set a user’s access. For more information see the sections regarding the various APIs.
Roles have five sections to control access: Main, General, Folders, Objects, and Filters.
Main Settings
The Main settings control the broad properties of the Role.

Id
A name for the role.
Active pre-v2019.1
Check to activate the role.
Note
As of v2019.1+, roles are activated via the Active Role setting in the Main Settings of Admin Console.
Include All Folders
If checked, all folders that are not listed in Folder Access will be available. If unchecked, only those listed in Folder Access will be available.
All Folders Read Only
If checked, all folders that are not specified in Folder Access will be execute-only. If unchecked, only those specified in Folder Access will be execute-only.
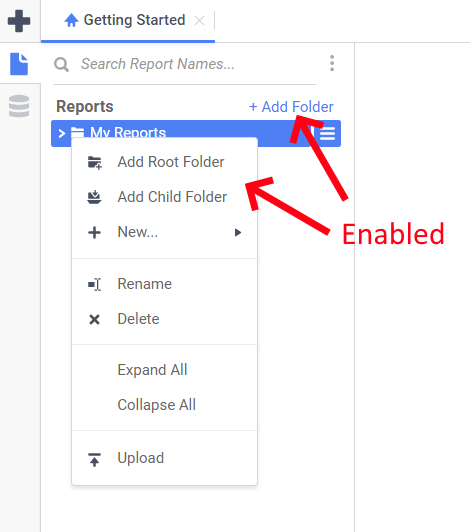
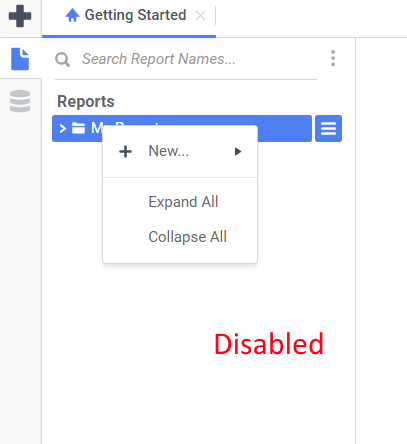
Allow Folder Management
If True, users will be able to create root and child folders, rename folders and delete folders in the user interface. If False, users cannot take action on folders and the Add Folder buttons are hidden from the user interface.
Include All Data Objects
If checked, all Data Objects that are not listed in Objects section will be available. If unchecked, only those listed in Objects Access will be available.
General Settings
The General settings of a Role override the some of the global General Settings. Utilize the API in order to overwrite additional settings for a user or group of users.
In Exago pre-v2020.1:
Report Path pre-v2020.1
The parent folder for all reports. The Report Path can be:
- Virtual Path
- Absolute Path: Used to provide increased security (ex. C:Reports)
- Web Service URL or .NET Assembly: Using a Web Service or .NET Assembly allows reports and folders to be managed in a database. For more information see Report Folder Storage & Management. A Web Service should be formatted as ‘url=http://WebServiceUrl.asmx’. A .NET Assembly should be formatted as ‘assembly = AssemblyFullPath.dll;class-Namespace.ClassName’.
Date Format
The format of date values. Can be any .NET standard (ex. MM/dd/yyyy). If left blank, this setting will inherit the environmental settings.
Time Format
The format of time values. Can be any .NET standard (ex. h:mm:ss tt). If left blank, this setting will inherit the environmental settings.
Date Time Format
The format of date-time values. May be any .NET standard (ex. M/d/yy h:mm tt). If left blank, this setting will inherit the environmental settings.
Note
For more details on .NET Date, Time and DateTime Format Strings, review the Standard date and time format string document on Microsoft’s website.
Numeric Separator Symbol
Symbol used to separate 3 digit groups (ex. thousandths) in numeric values. The default is ‘,’.
Numeric Currency Symbol
Symbol prepended to numeric values to represent currency. The default is ‘$’.
Numeric Decimal Symbol
Symbol used for numeric decimal values. The default is a period (.).
Server Time Zone Offset
Value that is used to convert server to client time (the negation is used to convert client to server time). If left blank, this setting will use server time to calculate value.
Time Zone Name v2019.1+
Default geopolitical location of the client as determined by the IANA time zone database (e.g., America/New_York). Utilized by Exago to properly combat scheduling issues centering around DST and other non-linear time zone conflicts.
Show Grid Lines in Report Viewer
Sets the default value for the HTML output option Show Grid. This can be modified in the Options Menu of the Report Designer.
Allow Creation/Editing of Advanced Reports
Displays/Hides the Advanced Report Wizard and Report Designer.
Note
If Allow Creation/Editing of Advanced Reports is False then attempts to edit Advanced or CrossTab reports will cause an ‘access denied’ message. Additionally, if False, users will not be able to create CrossTab reports.
Allow Creation of CrossTab Reports
When True, users can select to add a new CrossTab Report from the New Report icon in the main menu. When False, CrossTabs may only be added to an Advanced Report, provided that Show CrossTab Wizard is also True.
Show CrossTab Wizard
When True, users can add CrossTabs to their existing Advanced Reports from within the Advanced Report Designer, with the Insert menu.
Allow Creation/Editing of Dashboards
Enables/Disables the Dashboard Designer.
Allow Creation/Editing of Chained Reports
Enables/Disables the Chained Report wizard.
Allow Creation/Editing of ExpressViews
Enables/Disables the ExpressView designer.
Allow Editing ExpressView with Live Data
When True, users are allowed to make changes to an ExpressView when the in Live Data (Run) mode. When False, users must click the Stop button on the toolbar before changes may be made.
The default value is false for pre-v2021.1.1 or true for v2021.1.1+
Note
Prior to v2021.1.1 we recommend setting this to False. Editing live ExpressViews will cause an increase in Data Source requests, and may reduce performance.
Note
The Express Reports settings were removed from the Admin Console in v2019.2 of Exago but it remains available in the configuration file and the API.
Show Express Reports pre-v2019.2
Displays/Hides the Express Report Wizard.
Show Styling Toolbar pre-v2019.2
Displays/Hides the styling tools in the Layout tab of the Express Report Wizard.
Show Themes pre-v2019.2
Displays/Hides the Theme drop-down in the Layout tab of the Express Report Wizard.
Show Grouping pre-v2019.2
Displays/Hides the grouping tools in the Layout tab of the Express Report Wizard.
Show Formula Button pre-v2019.2
Displays/Hides the Formula Editor button in the Layout tab of the Express Report Wizard.
Database Timeout
Maximum number of seconds for a single query to run.
Caution
This value is passed on to the data source driver when the report is executed. Each data source driver, data source or individual database may interpret this setting slightly differently. Consult the official product documentation associated with your data source implementation for complete details how this setting will impact your environment.
Note
This setting will also control the maximum number of seconds that a Web Service API method can run. If set to 0 the Web Service API time out will be infinite.
Read Database for Filter Values
Enable/Disables filter drop-downs to contain values from the database. Set to False only if retrieving values for the drop-down will take more than a couple of seconds.
Show Report Scheduling Option
Displays/Hides the scheduler icon on the Main Menu. Set to False to disable users from creating scheduled reports.
Show Email Report Options
Displays/Hides the email report icon on the Main Menu. Set to False to disable users from emailing reports.
Show Schedule Reports Manager
Displays/Hides the scheduler manager icon on the Main Menu. Set to False to disable users from editing existing schedules.
Scheduler Manager User View Level
Controls what information each user can see in the Schedule Manager. These levels utilize the Parameters companyId and userId. There are three possible values:
- Current User: Can only view and delete report jobs that have been created by that user.
- All Users in Current Company: User can only view and delete report schedules for their company.
- All Users in All Companies: User can view and delete report schedules for all companies (administrator).
Allow Creation of Custom SQL Objects in Advanced Reports v2018.1+
Allow this role to create and execute reports with report-level custom SQL objects.
Warning
Carefully review the Report Level SQL article before enabling.
Allow Creation/Editing of Dashboard Visualizations
Display/Hide the Visualization item in the New Tile Menu and Tile Properties Pane of the Dashboard Designer.
Cache Visibility Level
Controls what visibility permissions users can assign to Execution Caches. Available levels utilize the parameters companyId and userId. See Scheduler Settings for more information.
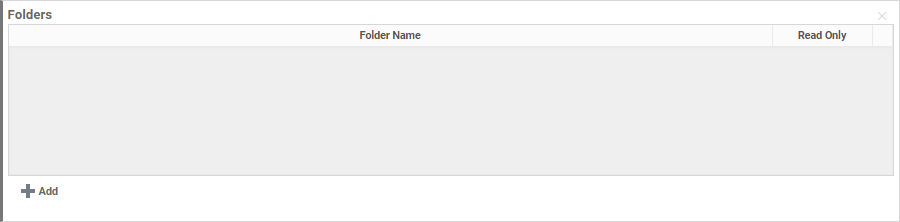
Folder Access
The Folder Access controls which report folders are visible and executable for the Role.
Caution
The Report Tree should contain no more than 1,000 items in it for best user experience.
All folders available in the Storage Management database will be available for selection here, regardless of the values of the identity keys. Access can only be granted to content that a user would already have access to through the Storage Management system.
Note
If Include All Folders is checked this list will deny access to the folders added. If unchecked, the list will allow access to the folders added. If All Folders Read Only is checked this list will overwrite the setting when a folder is added without the ‘Read Only’ option checked.
To add a folder to the list:
- Click the Add button.
- Click in the Folder Name column and select the folder you want to add.
- To make the folder execute only check the box in the Read Only column.
To delete a folder click the Delete  icon at the end of the row.
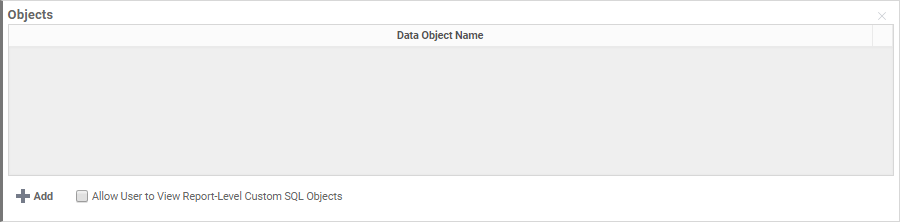
Objects Access
The Objects Access controls which data objects are accessible to the Role. A report can only be executed if the Role has access to all the data Objects on the report.
Note
If Include All Data Objects is checked this list will deny access to the data objects added. If unchecked the list will allow access to the data objects added.
To add a data object click the  Add button.
Click in the Data Object Name column and select the object you want to add.
To delete an object click the Delete icon at the end of the row.
Allow User to View Report-Level Custom SQL Objects v2018.1+
If Allow Creation of Custom SQL Objects in Advanced Reports is False, enable this setting to allow this role to run reports with report-level custom SQL objects. (Otherwise users will receive an “Access Denied” message when running such reports).
Filters Access
Filter Access provides a means to filter a Data Object by Role. Filters can be added to data objects so that users can only view specific rows in the data object. To set row-based tenancy in Exago:
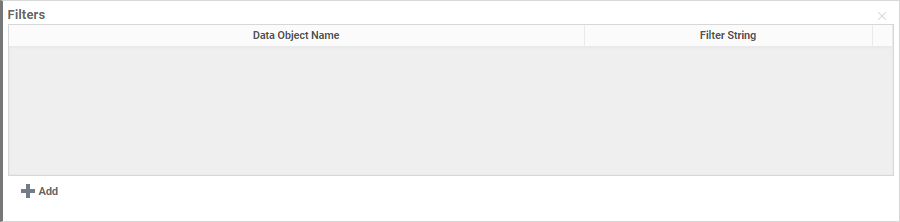
- To add a filter click the Add button.
- Select the Data Object Name from the dropdown.
Important
A Data Object may only appear in the list once. Adding the same Data Object multiple times is not allowed and will return an error message, “Please address the following errors before saving: Filters table contains the same object in multiple rows.”
- Enter the Filter String. The filter string should be valid, standard SQL to be added to the ‘WHERE’ clause sent to the Data Source. This filter string can include Exago system parameters (e.g. @userId@) or custom SQL including subqueries (e.g.
IN (SELECT EmployeeID FROM Employees WHERE EmployeeID <4)). The Filter String must contain the actual name of objects in the Data Source (e.g. tables, views, columns, etc…) rather than their Exago aliases.
To delete a filter click the Delete icon at the end of the row.
