Installing Exago on Azure
Microsoft Azure is a cloud infrastructure for hosting files, databases, virtual machines, and web applications. Exago supports various forms of integration with Azure.
- Virtual Machine — Exago can be installed on a Windows virtual machine on Azure.
- File Storage — Exago data can be stored and accessed from Azure storage containers.
- App Service — Although not recommended for production environments, the Exago Web Application, REST Web Service API and .NET API host apps can be installed as Azure App Services. An Azure Virtual Machine is also required for remote report execution when utilizing an Azure App Service.
These methods can be implemented independent of each other. However, Web App integration and VM integration are usually redundant with each other, and most Web App solutions should also implement Azure file storage. This guide will walk through how to set up each of these solutions.
Which solution should I use?
Azure virtual machines are the preferred implementation method for production environments.
Note
App Services should only be used for testing and demonstration—not in production.
File Storage
Exago can be integrated with Azure cloud storage for storage and live access to reports, templates, config, and other data files.
The following Azure resources are:
- Required
 Storage account
- Blob storage
- Optional
- Files storage
 Blob storage
 Files storage
Important
The Web Application, Scheduler Service, Web Service API and any cloud storage mechanisms must share at least one security protocol in common otherwise they will not be able to communicate with each other. For more information, refer to the Application Settings article.
Blob storage is a “flat” file system, which stores every file at the root level. To make use of this system, Exago emulates a directory structure using file names. Standard and premium blockblobstorage accounts are supported with Exago.
File storage is a directory-based system. Files are placed into directories, which can have sub-directories.
For pre-v2020.1, reports can be stored in File storage or Blob storage. Config files, templates, themes, and temp files must be stored in blob storage. For v2020.1+, only config files and temp files are stored locally. Reports, templates and themes are stored in a Storage Management database.
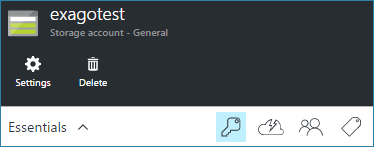
In your Azure Dashboard, begin by creating a new Storage account or navigating to an existing one.
This section is divided into three parts: Config file storage, Reports storage, and Temporary files storage (which includes themes and templates). If you are implementing Exago as a scalable app, you must set all three to static locations.
Config File
An Exago installation contains a configuration file, usually called WebReports.xml, which tells the application where to store Reports and Temp files.
First, in the Storage account, navigate to Access Keys. Record the two connection strings.
Azure Connection String
An Azure Connection String is a formatted string which contains your Azure account name and a unique alphanumeric key. It is used to give applications access to your storage account. The string uses the following format:
DefaultEndpointsProtocol=https;AccountName=acctName;AccountKey=encryptedalphanumerickey;
Next, there are two places which you need to specify the location of the configuration file:
-
-
- The appSettings.config file in the web app install directory.
- If you’re using the .NET API, a parameter in the API constructor method.
-
appSettings.config
Exago BI contains a file called appSettings.config in the root folder of the install directory. This file is used for custom app settings which are automatically imported into Web.config during runtime.
This file may also be used to specify other important environmental conditions, such as security protocols and input sanitation rules. More information about all available settings can be found in the Application Settings article.
Note
Do not edit Web.config file. It is automatically generated by Exago, and any changes will be overridden.
To set the config file location, add the following key to the appSettings.config file:
Important
The connection strings used for report, configuration file and temporary file storage must be unique.
<add key="ExagoConfigPath" value="pathtype=azure;credentials='Azure Connection String';storagekey=config"/>
-
-
- credentials: Your Azure Credentials Connection String.
- storagekey: The prefix of a blob container used to store the config file.
-
Caution
When both the REST Web Service API and cloud config storage are being used, the
ExagoConfigPathnode must be included in both the REST Web Service API and Web Application appSettings.config files.
API
.NET API host apps cannot access the appSettings.config file. Instead, use one of the following two methods to specify a config file location:
-
-
- Place the config key within the host application’s web.config or app.config.
- Or pass the connection string in the API constructor method:
-
Api api = new Api("/exago/virtual/path", "configFn.xml", "pathtype=azure;credentials='Azure Connection String';storagekey=config");
-
-
- storagekey: The prefix of the blob container used to store the config file.
- configFn: The name of the config file.
-
Caution
When both the REST Web Service API and cloud config storage are being used, the
ExagoConfigPathnode must be included in both the REST Web Service API and Web Application appSettings.config files.
Reports Storage
For versions v2020.1+, setup the Storage Management system for storing reports, templates and themes.
Upgrade Install
If upgrading from a previous version of Exago, review these articles:
- Storage Management: Introduction
- Storage Management: Transitioning from Legacy Storage Methods
- Storage Management: Getting Started
New Install
If this is a new installation, review these articles:
For Exago versions pre-v2020.1:
To use an Azure storage resource for report and folder management, enter a formatted connection string in the Report Path field in your config file.

Important
The connection strings used for report, configuration file and temporary file storage must be unique.
The connection string uses the following format:
pathtype=azure;credentials='Azure Connection String';storagekey='reports';usefilestorage=false
- credentials: Your Azure Connection String.
- storagekey: The prefix of the container used to store report files. Reports are stored in “storagekey-reports”, templates in “storagekey-templates”, and themes in “storagekey-themes”. This key is optional and defaults to “wrreports“.
- usefilestorage: If true, Reports are stored in File storage. If false, Blob storage is used. Templates and themes always use blob storage. This key is optional and defaults to false.
Note
Templates are automatically stored in blobs when the template upload button is used in Exago. Themes need to be manually uploaded to blob storage.
Migrating from local storage to Azure blob storage
Exago emulates a directory structure within a “flat” file system like Azure blob storage by placing a “placeholder.dir” block blob in each directory. This directory file serves as a reference to a folder within the blob container and is automatically added to new folders when the Report Path is set to an Azure blob storage container. If this file is not present, Exago will not be able to recognize that the virtual directory exists within a blob.
When migrating from local storage to Azure blob storage, this file will need to be manually added to pre-existing report folders as it will not exist in folders that were created when the report path was set to a local directory. In order to manually add this file to these folders, please follow these steps after the Report Path is set to an Azure blob storage container:
- In Exago, add a new folder to the Report Tree.
- With the Azure Storage Explorer, navigate to this folder.
- Copy the “placeholder.dir” blob within this folder and paste it into folders where it does not already exist.
Temporary Files Storage
Azure allows an App Service to be scaled up to multiple instances on separate servers. When implementing this configuration, take the following safeguards in order to prevent loss of user data.
Each instance of Exago BI has its own local temp directory, whose path can (optionally) be specified in the Temp Path setting in the config file (defaults to %INSTALLDIR%Temp).

In a scalable configuration, initial user calls will reach one instance, storing temp files on that server, but subsequent calls may reach a separate instance, which will not have those temp files in its local directory. There are two solutions to resolve this issue:
Temp Cloud Service
This is Exago’s built-in solution for handling multiple instances. Specifying a Temp Cloud Service causes each instance to push its temporary files to a shared Blob container. Then if a subsequent user call reaches a separate instance, that instance will pull the relevant files from the Blob to its local temp directory. Temp files may only be stored in blob storage.
To set up an Azure storage resource for temporary files:
- Create a container for temporary files with the Azure Storage Explorer. The default container name is
wrtempbut any container name, except for those used for report or configuration storage may be used by providing astoragekeyin the connection string in step 2. - Set the Admin Console > General > Main Settings > Temp Cloud Service to a formatted connection string.
Important
The connection strings used for report, configuration file and temporary file storage must be unique.
The connection string uses the following format:
pathtype=azure;credentials='Azure Connection String';
to save temporary files to the default blob container named wrtemp or
pathtype=azure;credentials='Azure Connection String';storagekey=tempFileStorageKey
to save temporary files to a blob container named tempFileStorageKey.
Examples:
type=azure;credentials='DefaultEndpointsProtocol=https;AccountName=acctName;AccountKey=encryptedalphanumeric';
wrtemp blob containertype=azure;credentials='DefaultEndpointsProtocol=https;AccountName=acctName;AccountKey=encryptedalphanumeric';storagekey=ourExagoTempFiles;
ourExagoTempFilesAzure Affinity Cookie
Azure supports setting Affinity Cookies, which track which server instance each user is connected to and cause all calls within the session to reach the same instance.
In your app service, navigate to Application Settings. Set ARR Affinity to On.

Virtual Machine
Exago can be hosted on a Windows-based Azure Virtual Machine. Installing Exago on a VM differs only marginally from installing it on a local machine. Therefore, this guide will not go into depth on this method. For a full installation and setup guide, see the Exago Installation Guide.
You can interact with a VM using either a remote desktop application or a command shell application.
Remote Desktop
- Using Remote Desktop Connection or another remote desktop application, view your VM as a desktop environment.
- Use a Web Browser to download the Exago Installer from our support site.
- Run the installer as Administrator and install Exago.
- Configure Exago (see Install and Configure).
Command Shell
- On a local machine, use the above steps 2-4 to create a temporary Exago installation.
- Remote into your VM using Windows PowerShell or another command shell application.
- Copy the Exago directory to a directory on your VM.
- Configure Windows and IIS (see Manual Application Installation).
After configuring IIS, open up the Exago port using a Windows Firewall inbound exception rule. You can then access Exago through the VM’s IP address. Set up DNS and data security as desired.
Azure App Services
Caution
Deploying the Exago Web Application in an Azure App Service also requires a separate Azure Virtual Machine and the Exago Scheduler Service for handling chart and map rendering. Consider using an Azure Virtual Machine for the entire deployment instead. See Configuring Remote Report Execution Host for Azure App Service Deployments for more information.
The following Azure resources are required:
- App Service plan
- App Service
 App Service plan
 App Service
Note
You may require a Storage Account to run Exago as a scalable app. See File Storage for details.
This section is divided into three parts:
- Hosting Exago BI in an App Service
- Using Exago Web Service API in an App Service
- Using the .NET API with Azure
Hosting Exago BI in an App Service
Note
This walk-through requires a local Exago installation. See the Exago Installation Guide for details.
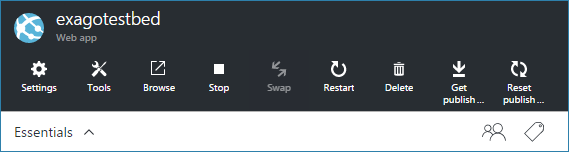
- In your Azure Dashboard, create a new App Service container or navigate to an existing one.
- In the App Service, navigate to Deployment Credentials. Add a username and password. This will allow you to FTP into your app service to transfer files.
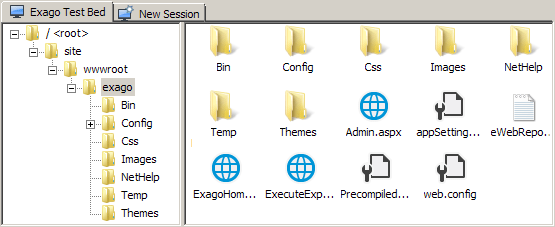
- Next, you’ll need an FTP application. Open a connection using the deployment credentials created in step 2. Copy your local Exago BI web app installation directory to the app service container.
- In the App Service, navigate to Application Settings. Set the following:
- .NET Framework version: v4.0 or Later
- Managed Pipeline Version: Integrated
- Under Virtual applications and directories create a virtual directory path to the installation directory and check the Application check box.
- Click Save to save your settings.
- Configure the Remote Report Execution Host as a Virtual Machine.
- Test your installation and by navigating to the WebAppUrlvirtual path to Exago App ServiceAdmin.aspx page (Admin Console).

If you will use Azure Blob Storage to store the config file, follow the File Storage instructions before setting the base config. We also recommend setting up a state server either with SQL Server or another database when running Exago in an Azure App Service. Review Setting Up a State Server. If you need more information, contact Exago Support.
Using Exago Web Service API in an App Service
Note
This walkthrough requires either a local Exago Web Service API installation, or a downloadable ZIP file containing the WebServiceApi directory. See the Installing and Configuring the Web Service article for details.
- Copy the contents of the local Exago installation’s WebServiceApi folder to the app service container.
- Under Virtual applications and directories create a virtual directory path to the WebServiceApi directory and check the Application check box.
- Click Save to save your settings.
- In Azure, edit the WebServiceApiConfigWebReportsApi.xml file as follows:
<apppath>virtual path to Exago App Service</apppath>
<webreportsbaseurl>virtual path to Exago App Service</webreportsbaseurl>
Note
Include a trailing slash for both the
apppathandwebreportsbaseurlelements. - In the WebServiceApiappSettings.config file, add a new key to enable the REST service.
<appSettings><add key="ExagoREST" value="TRUE" /></appSettings>
The result should be the following:
<?xml version="1.0"?>
<appSettings>
  <add key="ExagoREST" value="True" />
</appSettings>
- To prevent front end access without authentication outside of the API, in the Admin Console, navigate to General > Main Settings > set Allow direct access to Exago (bypassing API) to False. Click OK. Test your installation by navigating to the WebAppUrlExagoApi.aspx page. An ‘Unauthorized access. Please contact your administrator’ error message should appear. If you need more information, contact Exago Support.
- To test that the path was set correctly, navigate to WebAppUrlvirtual_path_to_Exago_App_ServiceApi.aspx. A test file listing avaiable supported operations in the API should appear.
- To prevent unauthorizedAdmin Console access to prevent users from inadvertently reaching it, delete WebAppUrlExagoAdmin.aspx and WebAppUrlExagoBinadmin.aspx.cdcab7d2.compiled.
Tip
Make a backup of the files before deletion in case Admin Console may be needed later.
- Test that Admin Console is no longer accessible by navigating to WebAppUrlExagoAdmin.aspx. A 404 error page should appear.
- Test that REST is enabled by utilizing an advanced REST client such as Advanced REST Client. Make a POST request to WebAppUrlvirtual_path_to_Exago_App_Servicerestrestsessions.
Header Name Header Value Accept application/json Content-Type application/json Authorization The REST authorization key. Review the Introduction to REST article for more information. Copy the AppUrl received in the response and append it to the end of the browser’s URL WebAppUrlvirtual path to Exago App Service The Exago front end should load, proving that the application can only be reached through the API.
- Configure the Remote Report Execution Host as a Virtual Machine.
Using the .NET API with Azure
Exago .NET API based host applications must be compiled locally before being uploaded to the Azure app container. References to the WebReports.dll library should be updated manually, and the program recompiled, when upgrading to a new Exago version.
Set your API constructor to use the previously set Exago virtual path:
Api api = new Api(@"/exago/virtual/path");
Important
.NET host apps can only access virtual paths (and not URL paths). Therefore they must be located in the same App Service container as the Exago web app.
Exago utilizes the virtual directory passed in the first argument of this constructor to locate the required .dll libraries to load Exago. In cases where the virtual directory is not specified within the API constructor (e.g., if Exago is installed on the root of the .NET host application), then a reference to the Microsoft.WindowsAzure.Storage.dll library will need to be added manually to the host application.
